
The Export Wizard on the Project Tab of the ribbon in LP360 provides a flexible way to convert LIDAR data to other formats. Such data includes the export format, extents, tiling of the data, or cookie cutting of the data using polygons. Derived attributes from interpolated elevations such as slope, aspect, and hillshade (brightness) can also be exported to raster files. LIDAR points within LAS files can also be exported to new LAS files. This is useful when isolating a smaller data set from a large data set for an analysis project, or tiling raw flight line data in preparation for a LIDAR project. LIDAR points from many LAS files can also be consolidated into larger LAS files.
To open the Export Wizard dialog, select the Export Wizard on the Project Tab of the ribbon in LP360.

Before deciding the Export Type, set the Input Points Filter to export only the points you want to be contained in the new dataset. The Input Points Filter works the same as the Live View Filter. If you have a classified dataset, this filter allows you to select the specific classes you would like included in your export. You can also apply filters to Returns, Point Source ID (Flight Line IDs), Elevation, and more to export a subset of the existing data.
Note: If you have particular Export Settings you like to use between projects, or if you need to share your export settings, there is an option to Save Settings/Load Settings at the bottom of the dialog.
Output Options
The next settings that can be applied to either Export Type is the Process by Point Source ID. This option allows you to process the export data by each flight line of your cycle/LAS data. This setting is optional.
After selecting the desired data (classify, elevation range, etc.) in the Input Points Filter, you can begin setting the options for exporting your dataset. Start by select an Export Type. With each Export Type (Points versus Surface) comes a variety of different options for exporting your data.
Export Type: Points
In Figure 1, the first page of the Export Wizard with the Export Type: Points selected.
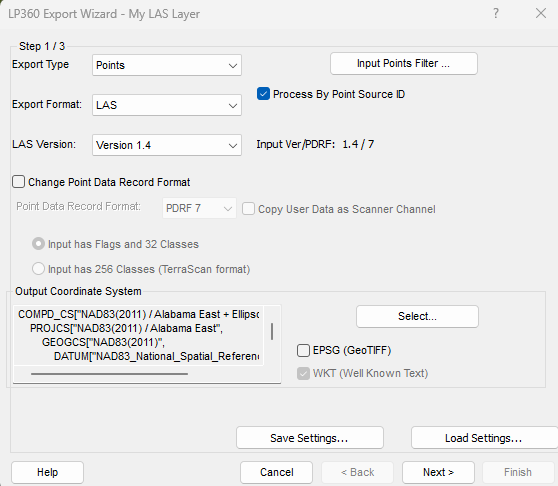
Points Export has five export format options:
- ASCII XYZ
-
LAS
- The LAS format gives the most control over the export parameters of your data (seen in figure above) compared to the other options available.
- Point Shapefile
- Microstation DGN
- AutoCAD DXF
Export Type: Surface
In Figure 2, the first page of the Export Wizard with the Export Type: Surface selected.
There are three Surface Methods available for this export type:
- Triangulation (TIN) - most commonly used
- Inverse Distance Weights (IDW)
- Point Insertion (PI)
There are also six export formats for this type:
- ASCII Raster
- Binary Raster
- ASCII XYZ
- GeoTiff
- IMG
- Cloud Optimized GeoTiff
The Surface Type also allows for multiple Surface Attributes to be selected. As each attribute is selected, a new (AttributeName) tab will appear next to the Surface tab in the dialog with specific settings for that attribute.
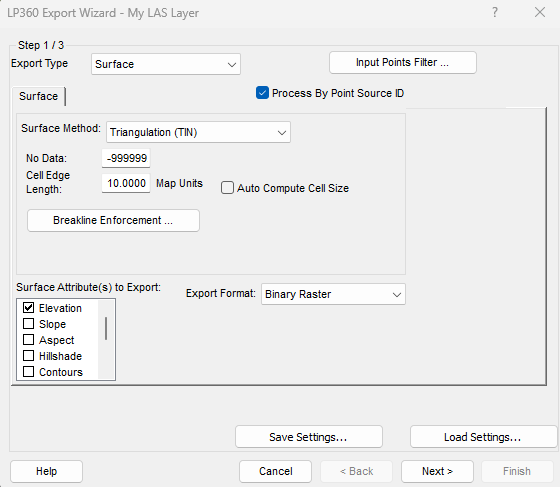
When using the Surface Export Type, you have the option of exporting Raster Files, Contours, Delta Z (dZ) images, or Density images using the Surface Attribute(s) selection. All Surface Attributes are listed below (options will vary based on Surface Method):
- Elevation
- Slope
- Aspect
- Hillshade
- Contours
- Intensity
- RGB
- Elev Diff (elevation difference)
- dz images
- Density
- Maz Z
- SDASN (Surface Precision) *deprecated by Surface Precision
- Global SDASN *deprecated by Surface Precision
- Interswath SDASN *deprecated by Surface Precision
Output Extent
The Export Wizard Step 2 page provides the ability to select an extent for your data output. For general extent options, there are two options available:
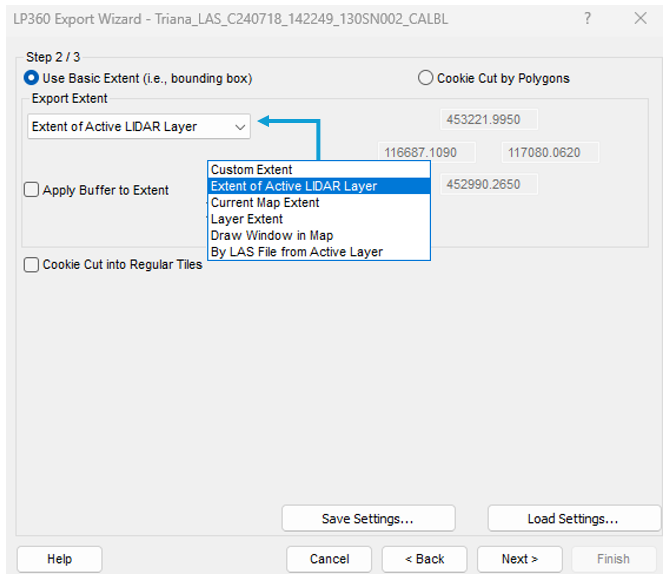
In addition to these two options, you can also use the Cookie Cut into Regular Tiles to cookie cut the extent of your dataset into regular tiled files instead of a single output file.
Export Location
Finally, on the page 3 of the Export Wizard, you need to set the file path and file name for your data. Press the ellipse (...) button to set the path and file name, then OK in the File Explorer window.
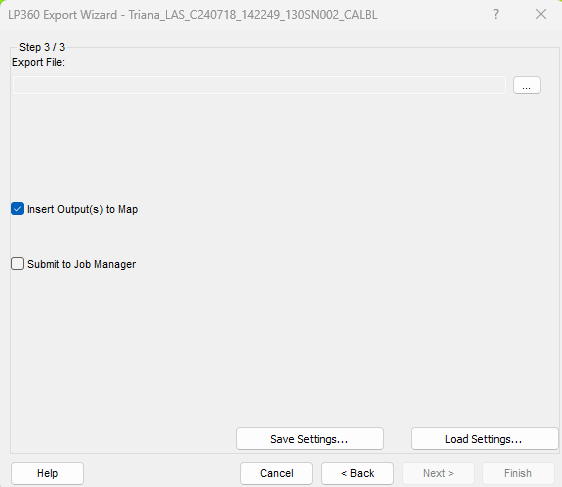
You also have the options:
- Insert Output(s) to Map - is an optional feature that allows for:
- Insert the output data to the map of your project and to Submit to Job Manager
-
Submit to Job Manager - is an optional feature that allows for:
- Offloading the export task to the Job Manager
.
- Efficient handling of large or lengthy processing jobs.
- Offloading the export task to the Job Manager
Comments
0 comments
Please sign in to leave a comment.