
One may add raster files using the Raster Tab of the Add Files dialog. Then, navigate to the desired Raster file(s).
An "undefined" Project Coordinate Reference System (CRS) will be automatically set by the Add Files dialog when only LAS, Raster or Feature layer is added.
If all three types are added at the same time, the priority used to set the Project CRS is:
- LAS
- Raster
- Feature
Learn more About the Raster Layer
The following are the currently supported raster file formats:
TIF (*.tif)
JPEG (*.jpg)
PNG (*.png)
GIF (*.gif)
BMP (*.bmp)
MrSID (*.sid)
JP2000 (*.jp2)
ECW (*.ecw)
IMG (*img)
For individual frame or panoramic photos see Adding Photo Layers.
How to Add Raster Layers
- Select Add Files
on the Import section of the Project tab to open the dialog.
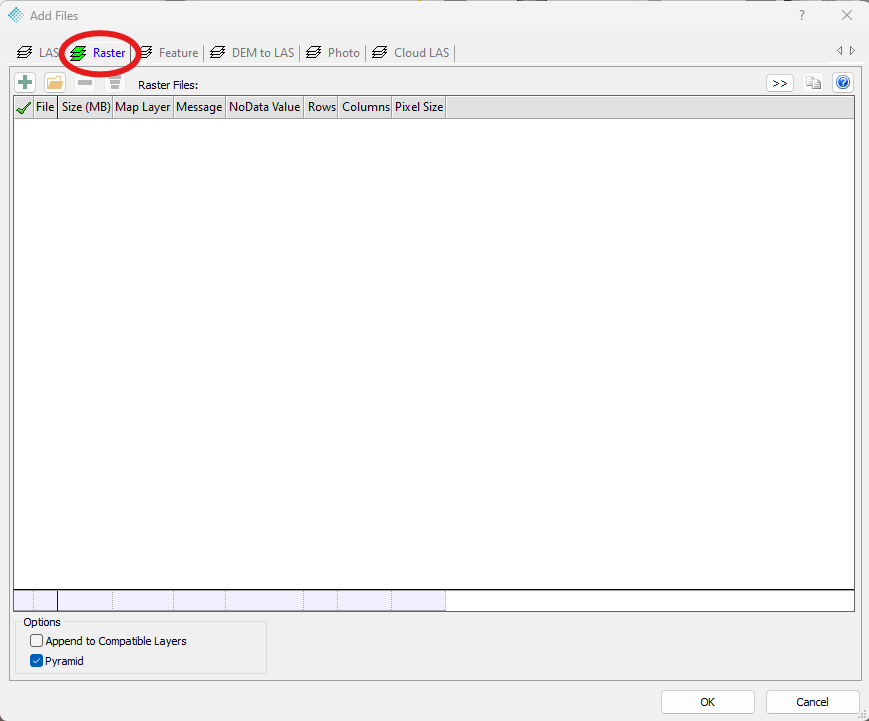
- Select the raster files to add by doing one of the following:
- Select the Add Files
button to select one or more files.
- If you have one or more folders from which you want to add all files contained within them, select Recursively Add from Folder
.
- To Remove
a selected file from the Files List
- or select Remove all
Files to clear the Files List.
- Select the Add Files
Note: The Recursively Add from Folder command allows you to add all the files of one folder or of multiple folders. You can use the Ctrl and Shift keys to select more than one folder at a time. All files in all the folders selected will be added as one layer.
- Look at the file list in the Add Files dialog box. You will see the header information for each file selected.
- Each column represents a field in each file, so with the file list, you can see much information about the file: the file size, the date of acquisition, the layer that the file is displayed in, the coordinate system used, etc.
- For more information and details about fields contained in the files, see the Add LAS Files File List.
- Each column represents a field in each file, so with the file list, you can see much information about the file: the file size, the date of acquisition, the layer that the file is displayed in, the coordinate system used, etc.
- In the Open Setting area, select whether you want the LAS files open to Read-Only or open Read-Write access after the files are loaded into the map layer.
- Select Open Read-Only if you want to prevent any changes from being applied to the LAS files being opened.
- Select Open Read-Write if you would like to be able to save any modifications made to the files.
- In the Load Setting area, select either Load Files or Load Footprints Only.
- Load Files if you want to read and display all point data from the LAS files.
- Load Footprints Only to display only the footprint of the LAS file(s) (i.e. Minimum Bounding Rectangles) in the map. This means that the LAS files are added to the LIDAR Layer in an unloaded state.
Note - You may later load LAS files that were added in an unloaded state. Just select the file in the LAS Files tab at the bottom of the TOC, right-click the LAS Layer, then click Load File.
- In the Options area, select any of the following options for the display of the files.
- Enable Append to Compatible Layers to recompute the map layer and add the selected files to an existing map layer if one exists.
- Leaving this item unselected will create a new layer even if the files' criteria match an existing layer. If you do not want to append the selected files to an existing layer, the new layer will be opened in the table of contents (TOC) as a NEW layer. You can rename the layer in the TOC after it is created.
- Enable Pyramid to ensure pyramids are created when importing the Raster layer.
- Enable Append to Compatible Layers to recompute the map layer and add the selected files to an existing map layer if one exists.
- Select OK to complete the adding files process.
Comments
0 comments
Please sign in to leave a comment.